
I have implemented many home automation projects at my house over the years for lighting, security, and climate control using Home Assistant, however, when the Energy Dashboard was added to Home Assistant Core 2021.8, I knew this integration would be the next logical step. After a few Google and Reddit searches, I decided on Shelly EM for the sensor I will use for monitoring energy usage. The main criteria for selection is the ease of use, no need for a ‘cloud’ account, and HA integration via the Home Assistant Community Store (HACS). Note – This blog posts assumes that you have some familiarity with electrical circuits. If you are not familiar or comfortable with wiring electrical circuits then contact a qualified electrician for assistance.
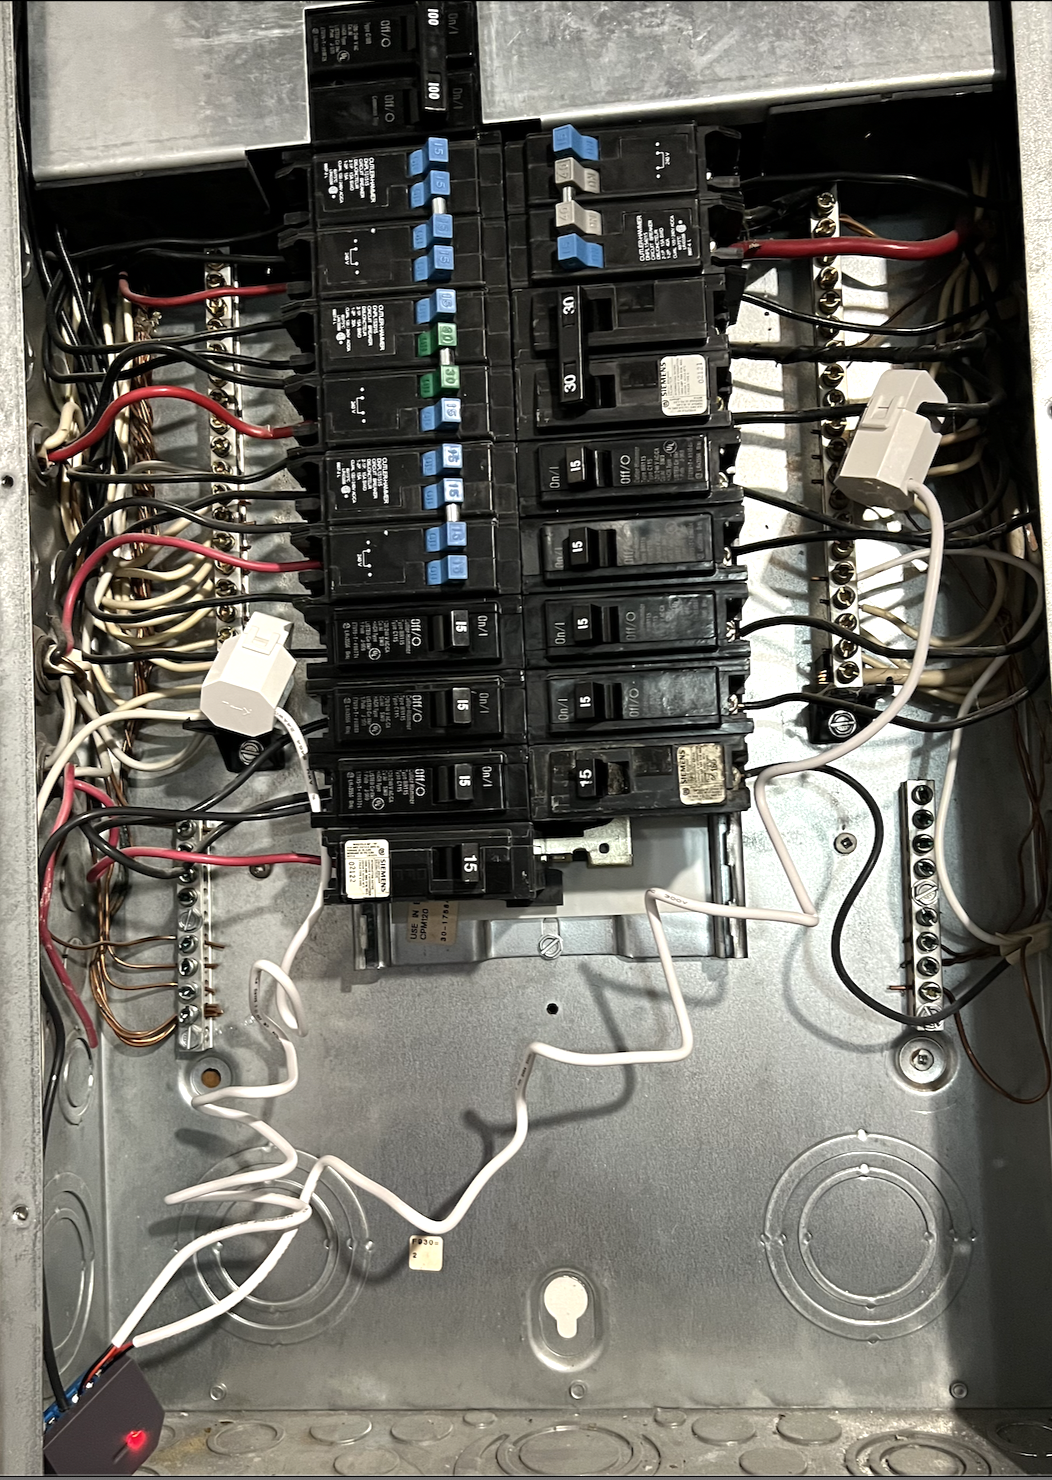
Installing Shelly EM in the breaker panel
To implement this project, you would need the Shelly EM and a “current transformer” to measure the power on the the circuit being monitored. The Shelly current transformers are rated at either 50A or 120A. The main electrical panel at my house is rated at 100A, and therefore, I would require a 120A current transformer. Ideally, I would have liked to monitor the energy usage for my whole house, however, the 120A transformer was not available at the time. So, considering that Canada is a temperate country where we have both hot and cold seasons, I decided the next best option would be monitoring the energy usage for my climate control system which is likely the largest energy consumer. I purchased the Shelly EM and two 50A clamps from Ktec Canada to monitor the air conditioner and the furnace.
The Shelly EM includes two monitoring channels which basically means that we can monitor up to two current transformers. The wiring for the Shelly EM is straightforward:
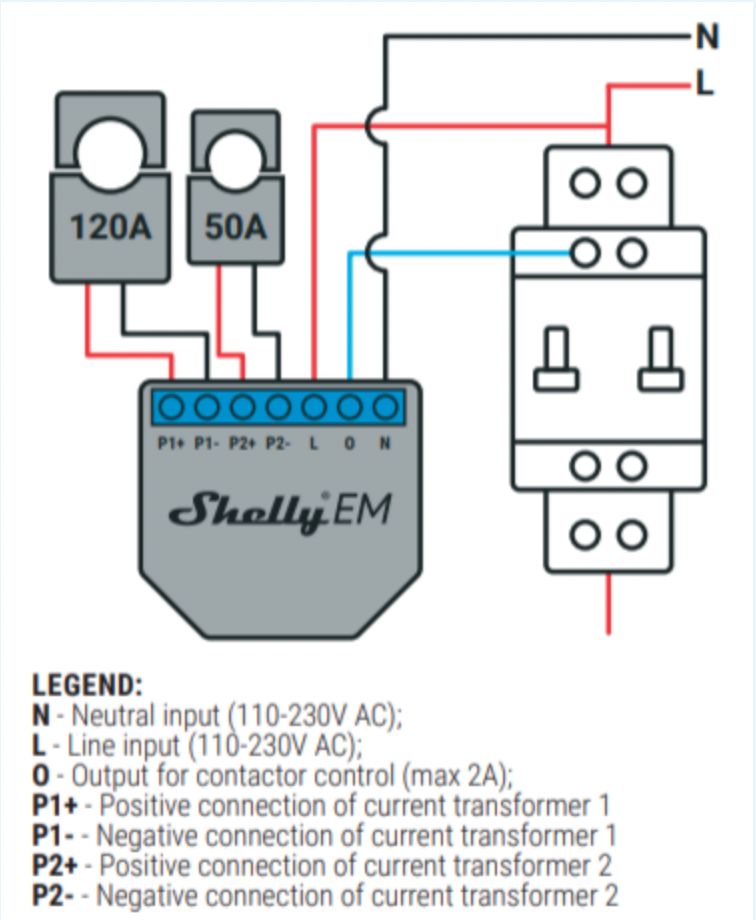
For my use case, I used both channels (one current transformer to monitor the circuit for the air conditioner, and the other for the circuit powering the furnace):
Once powered up, follow the Shell EM documentation to browse to the built in web page for initial setup. There are many videos available that walk you through the setup and therefore I would not be coving the setup in this post. However, I would recommend that you setup Shelly EM as a client on your wifi network and update the firmware as the very first task.
Shelly EM integration in Home Assistant
Navigate to HACS, search for “Shelly“, and install directly from HACS. Although you can install manually from the ShellyForHASS GitHub repository, I would recommend that you install directly from HACS. There is support for MQTT broker services but the integration exposes all of the required entities and attributes and I did not see any benefit to using MQTT. After installation, add the “shelly’ to configuration.yaml as follows:
shelly:
sensors:
- all #show all sensors
discover_by_ip:
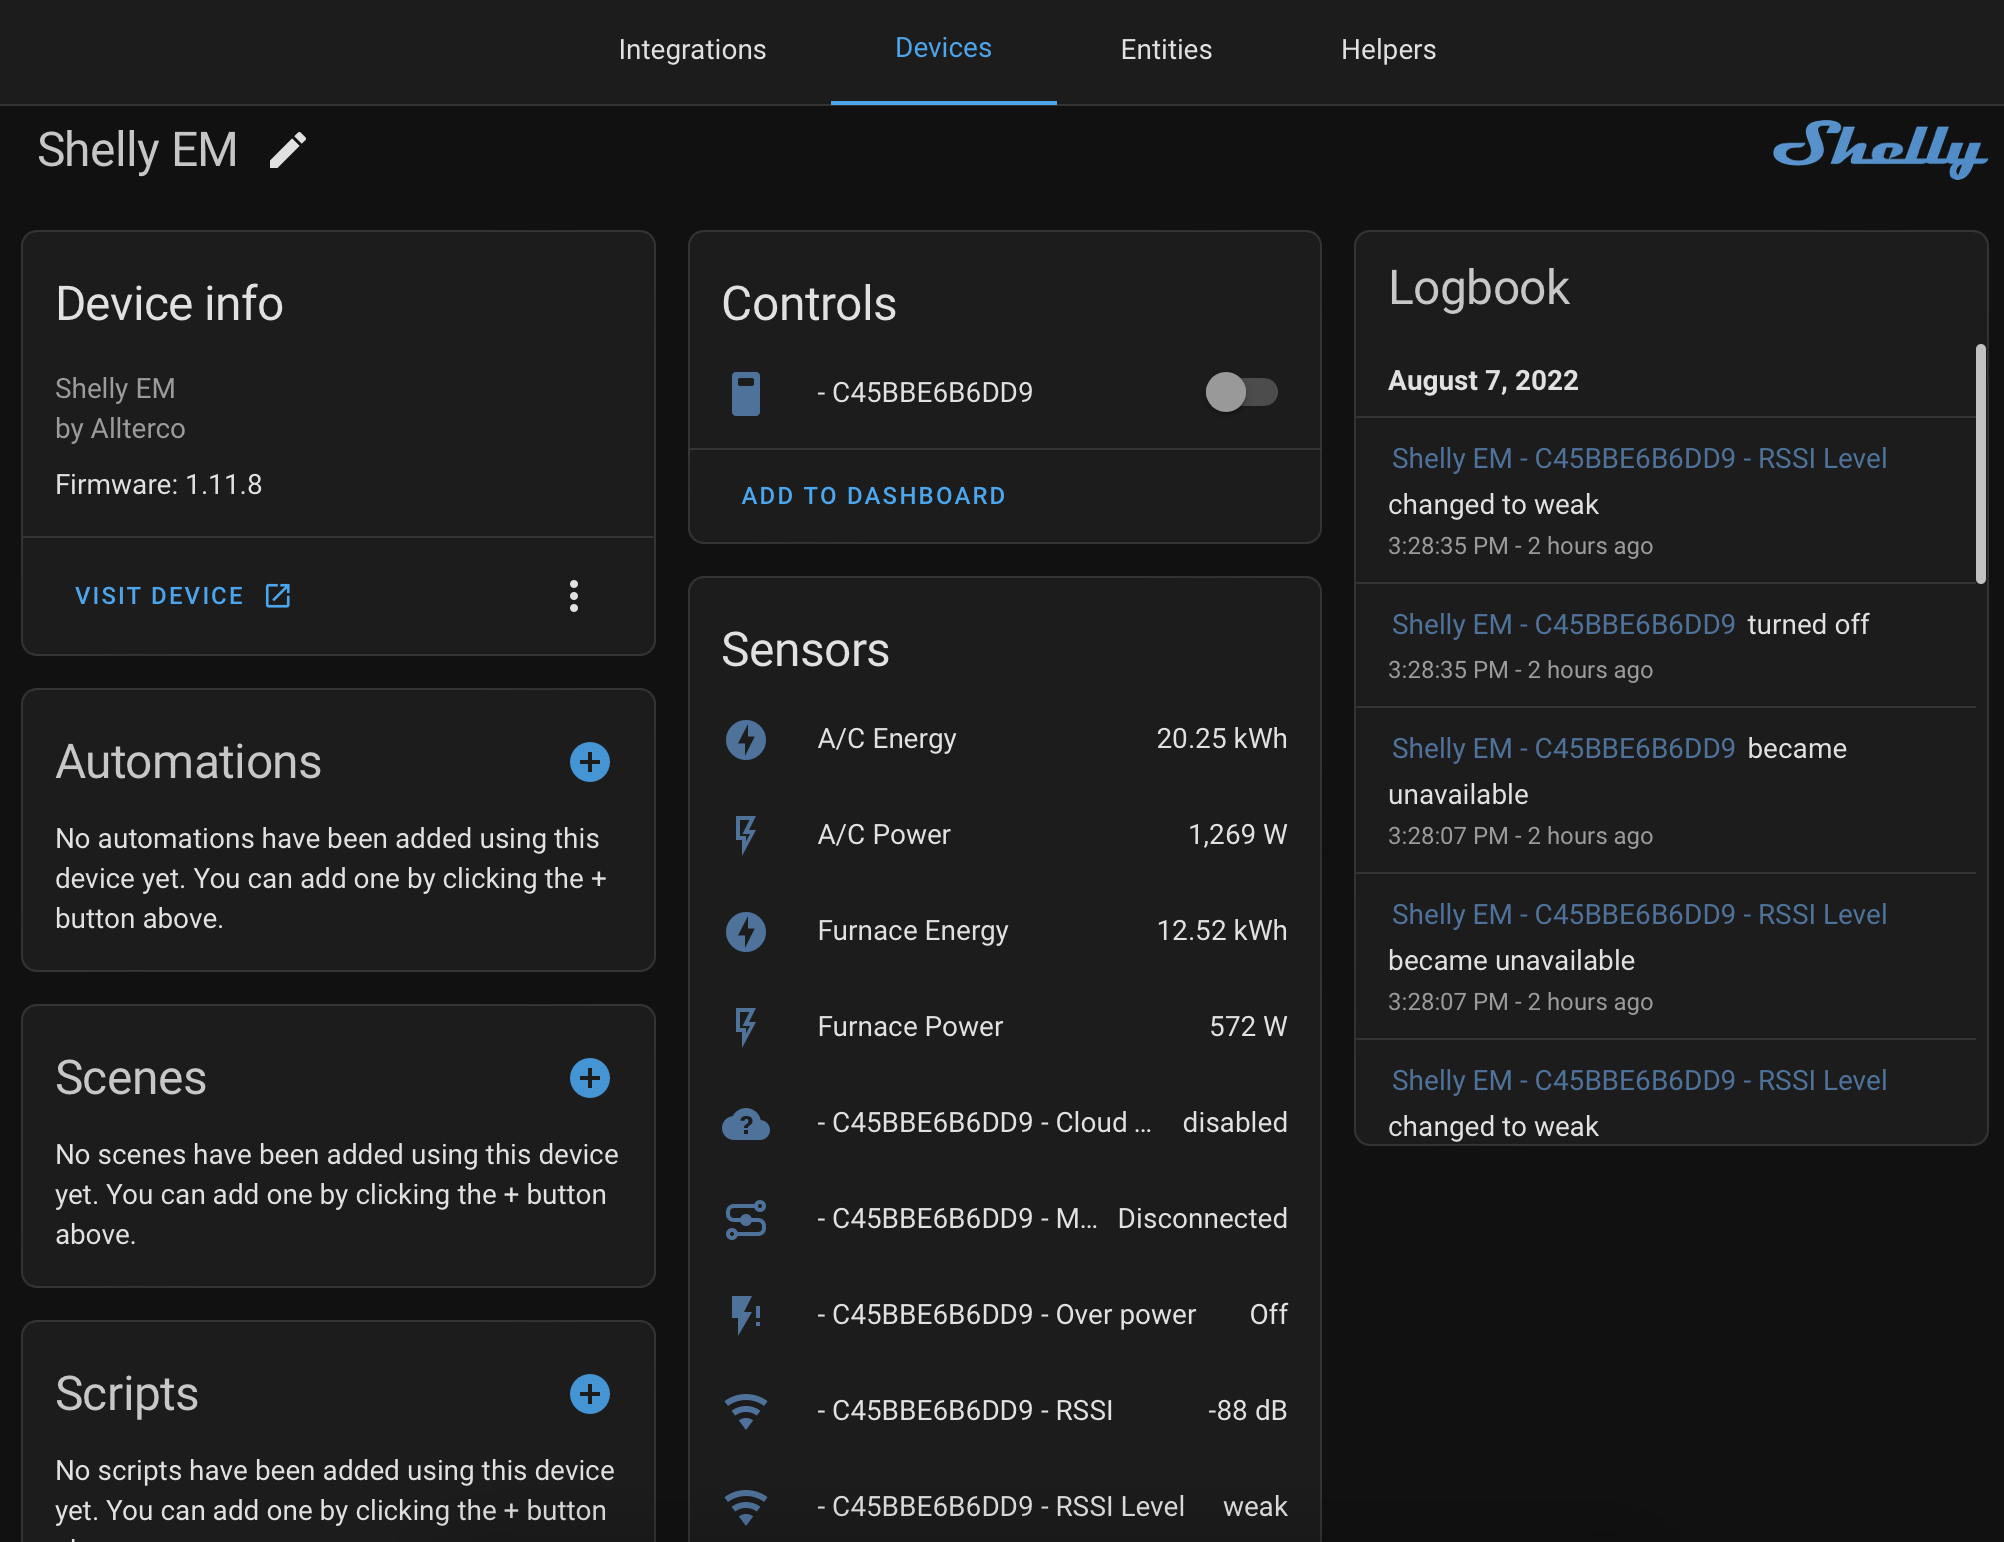
- "123.456.789.10" #ip assigned to Shelly EM by your wifi DHCPOnce your changes have been saved, navigate to Developer Tools –> YAML –> Check Configuration. If everything passes, restart HA. Next, navigate to Settings –> Devices and Services –> Devices and search for “Shelly“. You should find your newly installed Shelly EM configuration, which should be similar to the image below. All of the available sensors should be listed.
Configuring the Home Assistant Energy Dashboard
The residential rates and charges from TorontoHydro can be found here. The rates are tiered, meaning, that the kWh rate varies according to the day of the week and and time of day. In order to calculate the cost for the power used, I have created a new HA sensor based on code created by Reddit user u/jaymemaurice:
- platform: template
  sensors:
    hydro_ontario_cost:
      unit_of_measurement: "CAD/kWh"
      value_template: >-
        {## https://www.torontohydro.com/for-home/rates ##}
        {% set prices = {
          "off_peak": 0.082,
          "mid_peak": 0.113,
          "on_peak": 0.17,
          "delivery": 0.07,
        } %}

        {% if is_state('binary_sensor.workday_sensor', 'off') %}
          {{ prices.off_peak + prices.delivery }}
        {% else %}
        {% if now().month <= 4 or now().month >= 11 %}
        {% if now().hour >= 7 and now().hour < 11 %}
          {{ prices.on_peak + prices.delivery }}
        {% elif now().hour >= 11 and now().hour < 17 %}
          {{ prices.mid_peak + prices.delivery }}
        {% elif now().hour >= 17 and now().hour < 19 %}
          {{ prices.on_peak + prices.delivery }}
        {% else %}
          {{ prices.off_peak + prices.delivery }}
        {% endif %}
        {% else %}
        {% if now().hour >= 7 and now().hour < 11 %}
          {{ prices.mid_peak + prices.delivery }}
        {% elif now().hour >= 11 and now().hour < 17 %}
          {{ prices.on_peak + prices.delivery }}
        {% elif now().hour >= 17 and now().hour < 19 %}
          {{ prices.mid_peak + prices.delivery }}
        {% else %}
          {{ prices.off_peak + prices.delivery }}
        {% endif %}
        {% endif %}
        {% endif %}
Use the newly created sensor “hydro_ontario_cost” as the entity with the current kWh price when configuring the grid consumption panel within the Electricity grid section of the HA energy dashboard.
The Shelly integration provides the entities required for the energy dashboard with the ‘state_class: total_increasing’ and ‘unit_of_measurement: kWh’ attributes. No need to create availability sensors to make use of the ‘last_reset’ attribute, which was required with older HA versions. Use these sensors as inputs for the Energy Dashboard.
Conclusion
HA informs that it may take up to 2 hours for the graphs to load, however, I found that data was flowing in within minutes:
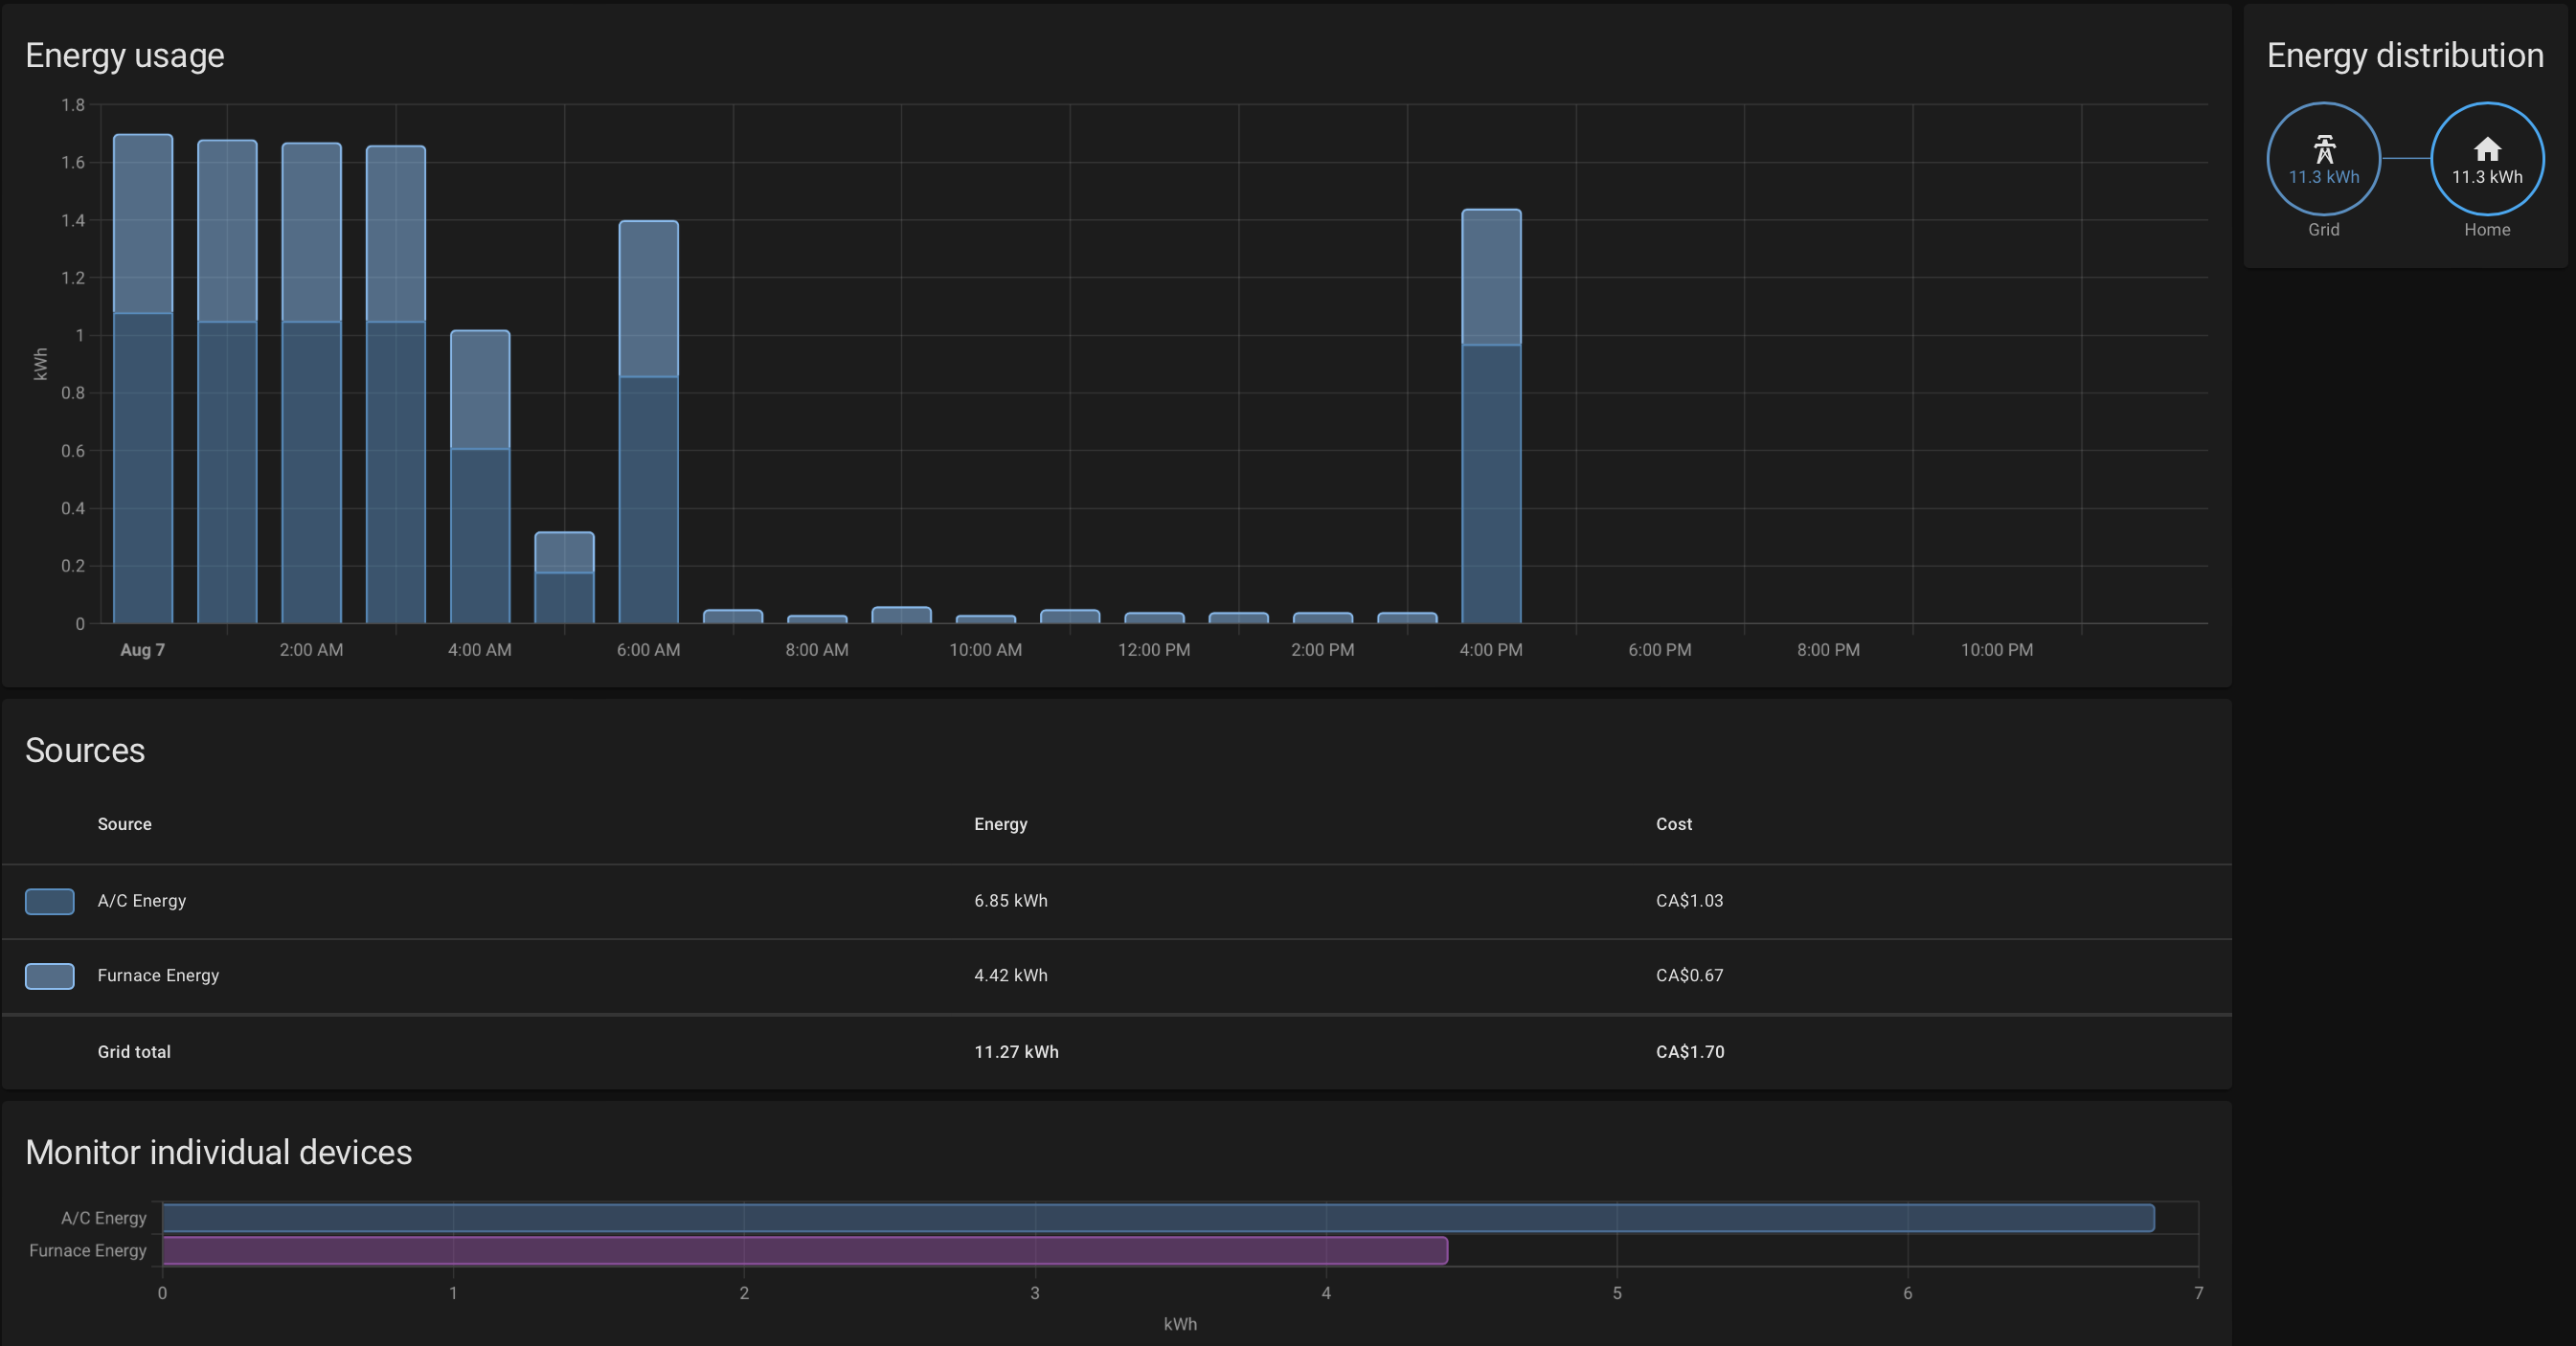
This is a wonderful integration from the HA team. I was able to configure and produce this useful dashboard in short time. I am now able to visualize the energy usage and costs over time directly within Home Assistant.